
What Does It Take to Do Screen Printing?

What Does It Take to Do Screen Printing?
When many craft enthusiasts first encounter screen printing, they mistakenly believe it’s a process that requires a professional workshop and expensive equipment. But in reality, using readily available, affordable materials, you can easily set up a complete home printing system right on your balcony or in your study—even with no prior experience—and create your own custom T-shirts, canvas bags, decorative art, and more. The entire process involves no complicated chemical procedures and produces no significant amount of harmful waste. It serves not only as a daily stress-relieving craft project but can also develop into a small-scale custom side business, making it a creative outlet with an extremely low barrier to entry.
Screen printing’s core principle relies on the structural characteristics of a screen—where the mesh is open in the image areas and completely closed in the non-image areas—to precisely transfer ink onto the substrate surface through the pressure applied by a squeegee. The key elements for successful screen printing can be divided into four major categories: hardware equipment, compatible consumables, operational skills, and environmental conditions. The configuration offers great flexibility across different application scenarios; there is no need to invest in top-of-the-line industrial equipment from the outset, as upgrades can be made gradually based on specific needs.
- Preparing Materials
This section covers the physical fundamentals of screen printing. The cost difference between configurations with different positioning options can vary by a factor of tens; you can choose flexibly based on your specific needs.
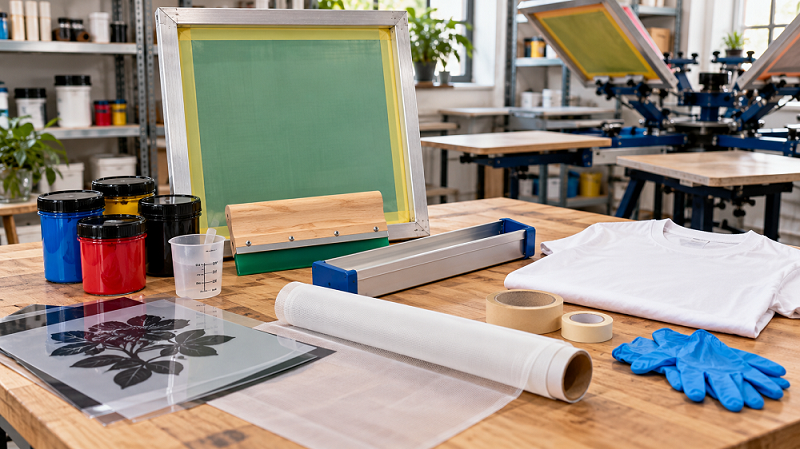
Screen Printing System: The core consists of a frame and a mesh. For home use, a wooden frame paired with a 120–160-mesh polyester screen is sufficient, costing only about five dollars; Mesh in this count range ensures sharp line definition for standard designs while minimizing frequent screen clogging, making it extremely forgiving for beginners. For professional production, high-strength aluminum frames are recommended, with mesh counts ranging from 80 to 350 depending on the required print precision—lower mesh counts are suitable for printing with thick ink layers, while higher mesh counts are ideal for fine lines and small text.
Printing Tools: The squeegee is the key component that determines ink layer uniformity. For home use, a 60-degree medium-hardness rubber squeegee is sufficient to meet most needs; for professional applications, prepare squeegees with different hardness levels (50–70 degrees) to accommodate various scenarios such as curved surfaces, flat surfaces, and intricate designs.
Inks and Related Consumables: Select the appropriate ink based on the type of substrate. For fabric substrates, prioritize eco-friendly water-based inks; It has no pungent odor and is suitable for home ventilation environments. With five basic colors—red, yellow, blue, black, and white—it can be mixed to create virtually any color needed for everyday use. For hard substrates such as plastic and metal, use solvent-based or UV inks. Pair these with corresponding thinners and curing agents to adjust ink viscosity and curing speed.
Plate-Making Auxiliary Equipment: For home use, midday sunlight can serve as the exposure light source; place the film between two sheets of clear glass to create the plate. Professional setups require a UV exposure unit and a high-pressure water jet for plate washing, which significantly improve plate-making efficiency and pattern accuracy.
- The Complete Process of Safe Plate Making
Having the right hardware is just the foundation; mastering standard operating procedures is essential to avoiding a large amount of scrap—and this is the core element that beginners most often overlook.
Design Preprocessing Skills: The ability to convert design files into a format suitable for screen printing; for multicolor designs, separate colors into individual layers and add precise registration marks to prevent misalignment during the printing process.
Standard Screen Making Skills: Master the entire process—including uniform application of photosensitive emulsion, precise exposure, and high-pressure washing—and be able to independently repair holes in the mesh and clear screen clogs to ensure that the mesh openings in the image areas are completely open and that there are no missed dots in the non-image areas.
Printing Execution Skills: Control the angle, pressure, and speed of the squeegee to ensure a uniform ink layer with every pass. Master alignment techniques for multicolor registration to prevent common issues such as image bleeding, ragged edges, and misregistration.
Post-processing skills: Select the appropriate drying and curing method based on the ink type. Textile inks require thorough heat curing to ensure wash resistance, while UV inks require controlled UV exposure duration to prevent the ink layer from becoming brittle and cracking.

- Environmental and Safety Support Facilities
Screen printing doesn’t have strict environmental requirements, but a few key details directly determine the user experience and the quality of the finished product.
Light-proof environment for plate making: In a home setting, simply drawing thick curtains to block out sunlight and UV rays is enough to set up a temporary darkroom, preventing the photosensitive emulsion from being prematurely exposed and rendered ineffective.
Ventilated Workspace: Maintain good ventilation in the printing area to accelerate ink drying and prevent the buildup of volatile odors from solvent-based inks, ensuring a healthy working environment.
Flat Work Surface: The printing surface must be absolutely flat; in a home setting, a solid wood board can serve as a substitute. This prevents localized indentations when the substrate is placed, which could lead to uneven printing pressure and ink skips.
Basic Safety Equipment: Wear nitrile gloves during operation to prevent direct skin contact with ink, and have a dedicated cleaning solution on hand to promptly clean up ink splatters and avoid contaminating the surrounding area.

- Advanced Optimization and Troubleshooting Skills
Once the basic process is up and running, mastering these advanced techniques can significantly improve the quality of your final products and resolve the vast majority of common issues. Screen printing does not have high requirements for the operating environment, but several key conditions directly determine the user experience and the quality of the finished product.
Material Compatibility Tips: Adjust the screen mesh count, ink viscosity, and squeegee hardness based on the substrate. For example, when printing light-colored designs on dark T-shirts, apply a layer of white undercoat first to enhance color saturation.
Quick Troubleshooting: Quickly identify common issues such as screen clogs, pinholes, and jagged design edges. Correct these issues promptly by adjusting exposure time, replacing the squeegee, or cleaning the screen to reduce the scrap rate.
Reusing Screens: After printing, promptly remove the photosensitive emulsion from the screen using a release agent. Once washed and dried, the screen can be re-coated with emulsion to create new designs, significantly reducing long-term consumable costs.
Overall, screen printing has an extremely low barrier to entry; even a starter kit costing just a few twenty dollars is sufficient for basic creative projects. However, producing consistent, high-quality results still requires continuous practice and refinement in terms of material selection and technical skills. Beginners don’t need to purchase a full set of professional equipment right away; by starting with simple, DIY projects at home and gradually upgrading their setup, they can slowly master this craft and progress from simple, single-color designs to complex, multi-color works.
How much does screen printing usually cost?
Related Article


