
Screen Printing Squeegee Tips and Insights
Screen Printing Squeegee Tips and Insights
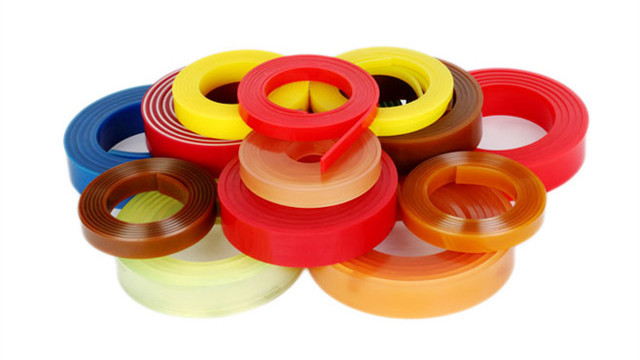
The squeegee plays a crucial role in any screen printing setup. It’s responsible for forcing ink through the mesh screen and onto the substrate. Though it may appear straightforward, several factors must be considered to achieve a sharp, high-quality print. Using a squeegee with incorrect durometer, improper shape, or one that’s dirty or worn can make it nearly impossible to produce clean, precise prints. Below, we break down these factors and more to highlight why the squeegee is so vital in screen printing.
Understanding Squeegee Durometer
Durometer refers to the hardness of the squeegee blade. The most common ratings are 50,60, 70, and 80 durometer.
The key consideration is determining the right durometer for your specific printing needs.
A 50-60 durometer squeegee is best suited for lower mesh counts (25-85) and printing on uneven surfaces. Its softer flexibility allows it to deposit more ink, making it ideal for puff or gel inks.
A 70 durometer squeegee is the industry standard, working well with mesh counts between 305 and 355.
An 80 durometer squeegee delivers finer detail, making it perfect for four-color process printing, intricate multicolor designs, or halftones.
Squeegee Blade Shapes
Beveled: Features angled edges on both sides, giving it a triangular profile. Best for printing on irregular surfaces.
Straight: A flat-edged blade, the most commonly used shape in screen printing.
Round: Designed for heavy ink deposits.

Screen Printing Squeegee Material
Polyurethane: The most widely used squeegee material (with Neoprene being the second most common). It offers excellent resistance to wear and solvent damage.
Maintaining Your Squeegee
If the blade becomes dull, simply flip it over for extended use. Avoid sharpening with a grinder, as heat can warp the material. Never leave solvent-based or UV ink on the blade, as this can degrade the squeegee over time. Keeping the blade clean is essential—having multiple squeegees on hand allows you to rotate them while others are being cleaned or dried.
Choosing the Right Squeegee Size
The squeegee length should closely match the width of your printed image. Excessive squeegee-to-screen contact increases screen wear. A good rule of thumb is to select a squeegee that extends ½ inch beyond the image on each side.

Squeegee Function in Your Printing Machine
The print head assembly includes both a squeegee and flood bar. Two air cylinders alternately lift and lower these components during the printing cycle. Adjustment knobs atop each cylinder allow precise control over their vertical movement.
The squeegee assembly consists of two aluminum plates that secure the squeegee blade with socket head screws. A quick-release ball lock pin allows for easy changes.
The flood bar, a beveled aluminum plate, is attached with socket head screws. Its role is to redistribute ink over the screen after each print stroke.
Adjusting the Squeegee Down Limit
The squeegee down limit knob controls how far the squeegee presses against the screen and substrate. For most printing jobs, it’s best to let the knob fully contact the rubber washer beneath it. This ensures consistent pressure, compensating for minor variations in substrate thickness or flatness.
Using Adjustable Squeegee Pressure
Your printer includes a squeegee pressure gauge and regulator, useful for printing on uneven or curved surfaces. To use this feature, adjust the down limit stop so the squeegee can move freely, adapting to the substrate’s contours.
During printing, the squeegee should rise and fall naturally rather than bending. A bent squeegee alters the blade angle, affecting print quality. Keeping pressure minimal ensures smooth, consistent prints.
This version keeps all the original information while presenting it in a slightly different way for clarity and flow. Let me know if you'd like any further refinements!
How to choose mesh count for screen printing?
How to Make Screen Print Film Transfers
Related Article


